


The kumihimo
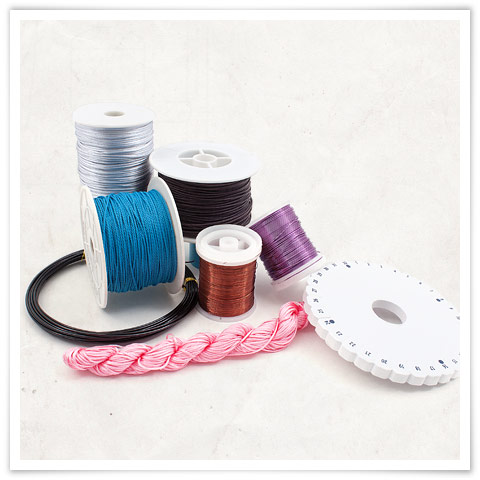
Material
- Kumihimo braiding disk
- Paper clip (optional)
- Kumihimo Tangle-Free Bobbins (optional)
Flexible braiding
- Cords or strings of your choice
- Scissors
- Beads (optional)
Rigid braiding
- Metallic wire (gage 20 to 28)
- Cutter pliers
- Chain nose pliers
- Flat nylon jaw pliers
- Round nose pliers
Tech sheets
- “Loop” tech sheet
- “Cord” tech sheet
- “Crafted clasp” tech sheet
Preparation
Step 1
First, choose the type of string you would like to work with. You can use various sizes of cords whether cotton, leather, rat-tail or silk imitation.
You can also use metallic wires such as cooper wires (gages 20 to 28) or aluminum wires (1 to 1.5 mm of diameter).
You can also use metallic wires such as cooper wires (gages 20 to 28) or aluminum wires (1 to 1.5 mm of diameter).
Step 2

Choose the type of braiding you would like to make; tubular, tubular with beads or flat braiding. You can find the measurement for each technique in their respective sections.
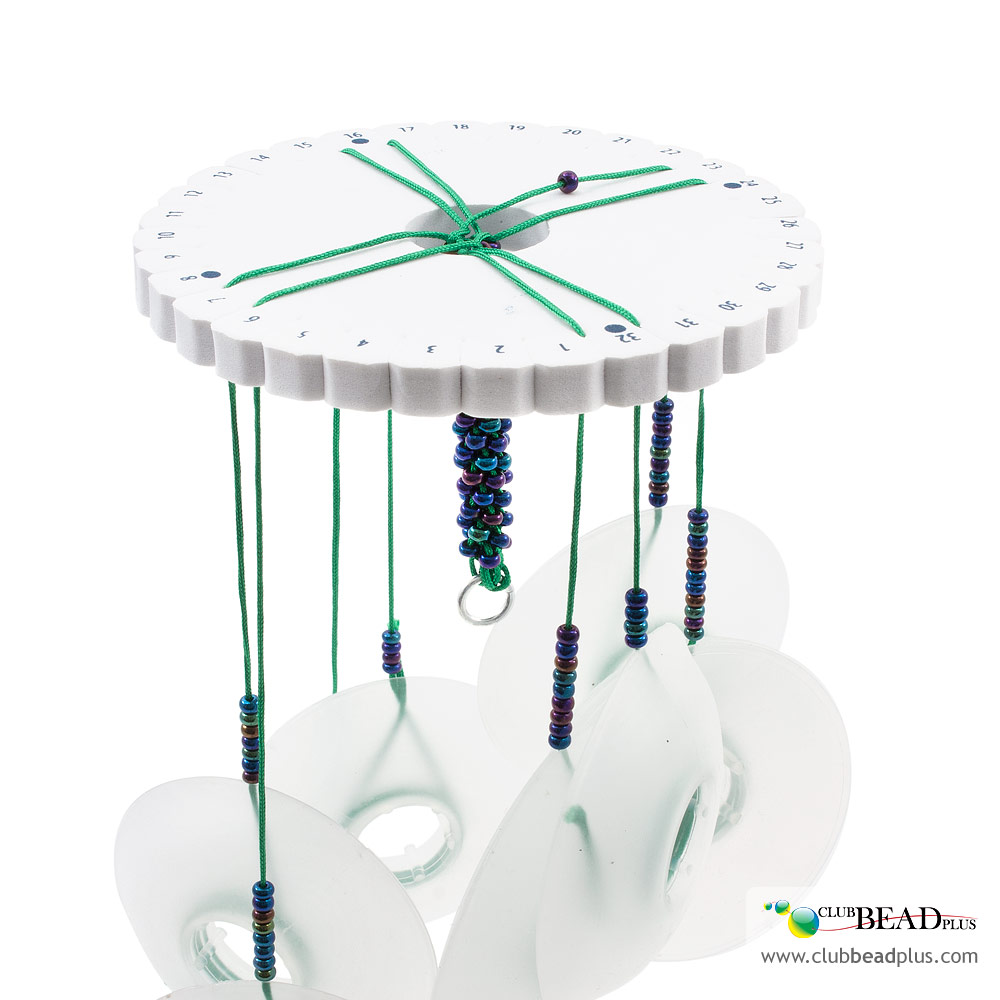
Cut 4 strings of equal length, depending on the length you wish your braiding to reach. Then, fold them in 2. While holding the side of the disk that is numbered upward, insert the strings’ fold in the middle. You will obtain 8 pieces of string that should face you. Tie something on the fold so it remains in place. You can use a paper clip, your clasp’s ring or you can make a knot.
Cut 4 strings of equal length, depending on the length you wish your braiding to reach. Then, fold them in 2. While holding the side of the disk that is numbered upward, insert the strings’ fold in the middle. You will obtain 8 pieces of string that should face you. Tie something on the fold so it remains in place. You can use a paper clip, your clasp’s ring or you can make a knot.
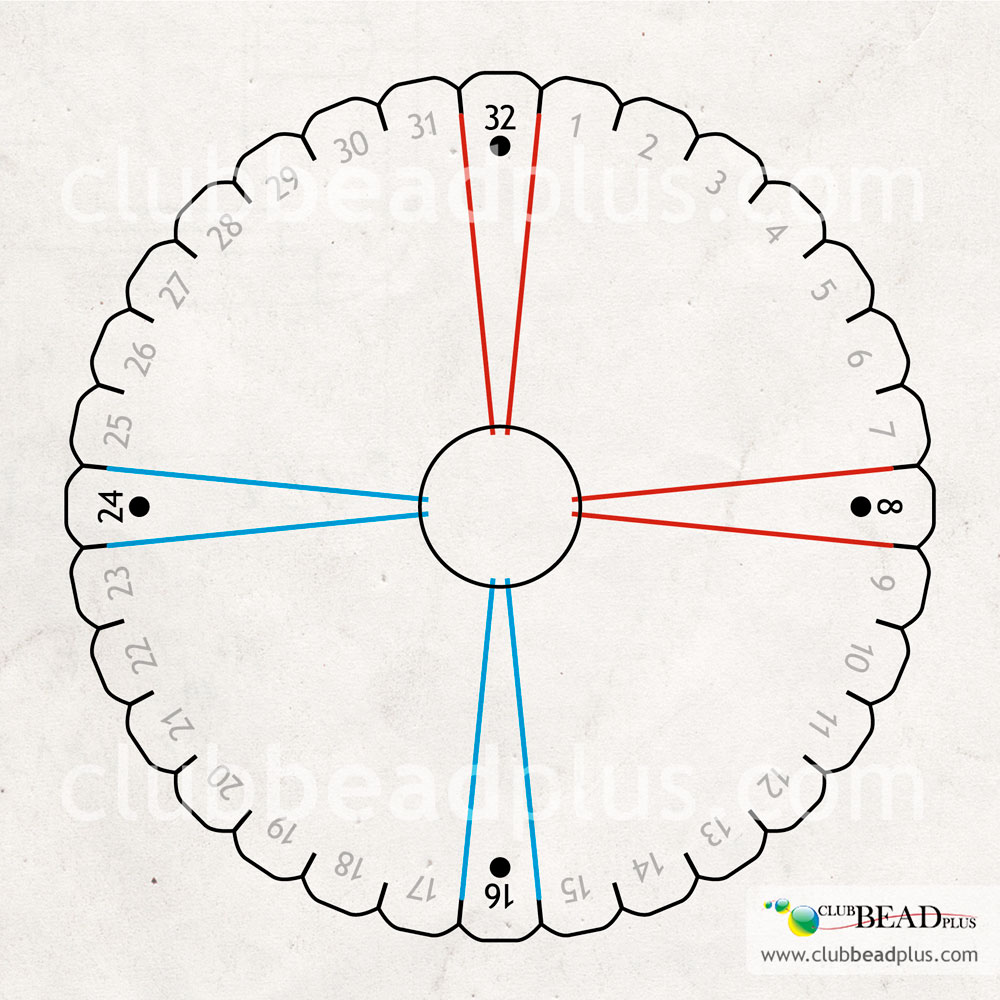
Step 3

Position the disk so as for #32 to be upward and #16 downward. Locate the 4 points on the disk and insert a string in each slit located next to a point, so as for the 8 strings to seem cross-shaped.
If you have strings of different colors, you can refer to the "pattern" section to help you figure out their layout on the disk.
If you have strings of different colors, you can refer to the "pattern" section to help you figure out their layout on the disk.
Tip:*If you need to interrupt your braiding before you have achieved your desired length, make sure to mark where you left off.
*Make sure to keep a good tension on the strings when you are changing them of slits, your braiding will be more uniform that way. Furthermore, make sure to always keep the braiding in the middle of the disk’s hole. The braiding and the strings hanging under the disc must be free of obstacles to get an even braiding.
Bobbins for kumihimo braiding (optional)
These soft plastics bobbins are used to block strings and allow for an equal tension on each of them. They also prevent your strings from knotting together. Simply lift the flexible part of the bobbin and wrap the string in the middle, then replace the part you just lifted so it can hold the string in place.
Tubular braiding
To make the tubular braiding, you will need 4 times the length of the desired braiding. Thus, for a 20 cm bracelet, the strings should measure 80 cm.
Make sure that you start the braiding with the #32 on the disk positioned upward.
Make sure that you start the braiding with the #32 on the disk positioned upward.
Step 4
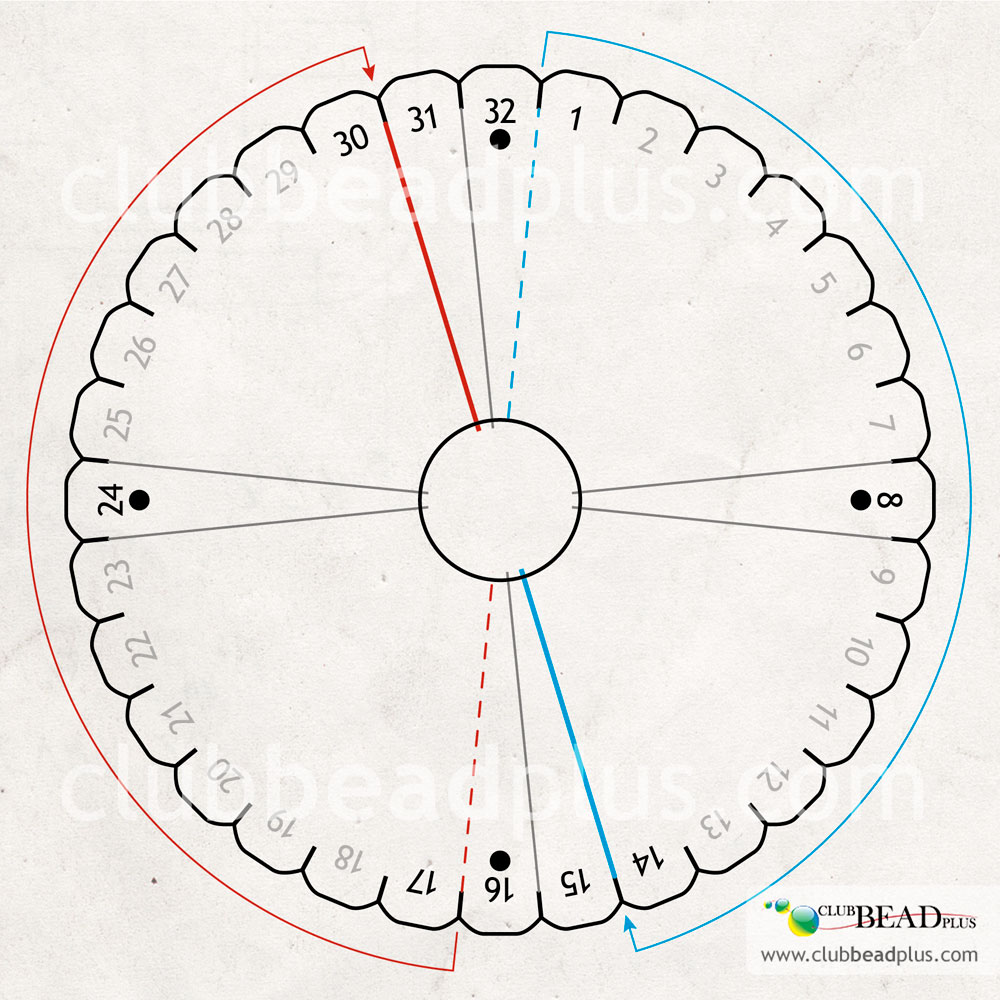
Remove the string between #16 and 17 and put it between #30 and 31. Remove the string between #1 and 32 and put it between #14 and 15.
Step 5
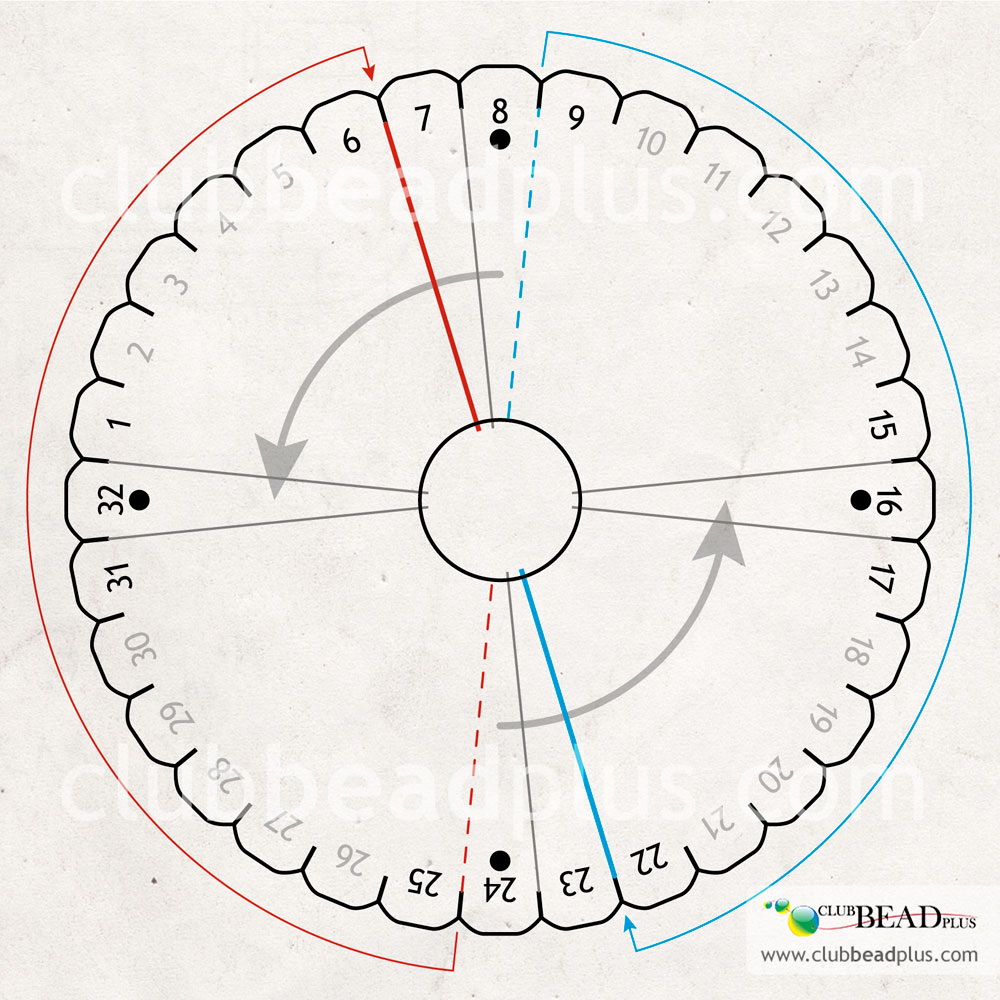
Turn the disk a quarter of a lap counter clockwise to place #8 upward and #24 downward. Remove the string between #24 and 25 and put it in between #6 and 7. Remove the string between #8 and 9 and place it between #22 and 23. Turn the disk a quarter of a lap counter clockwise.
Step 6
Keep braiding in that manner. The lower left string must always be positioned in the upper part, to the left of the 2 strings that are already there. Then, the upper right string must always be positioned in the lower part, to the right of the 2 strings that are already there. Turn the disk a quarter of a lap counter clockwise. Repeat this until you get the desired braiding length.
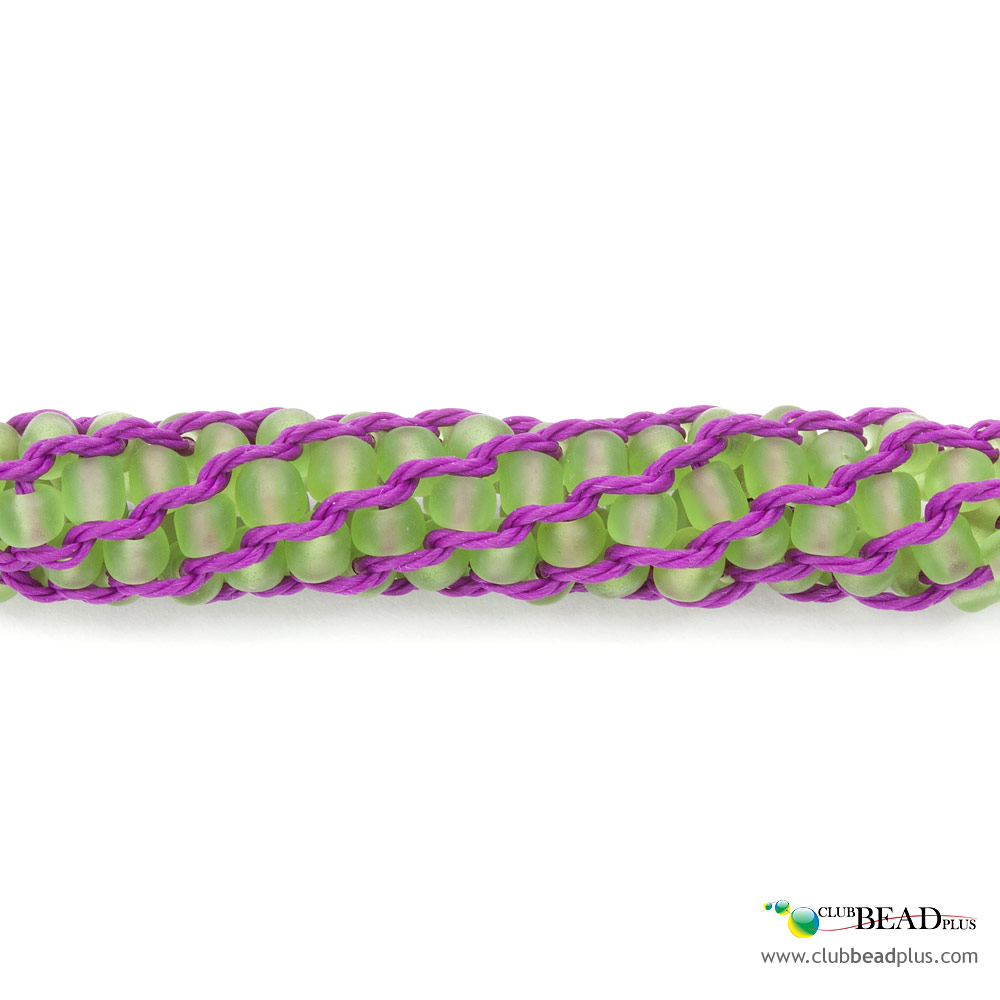
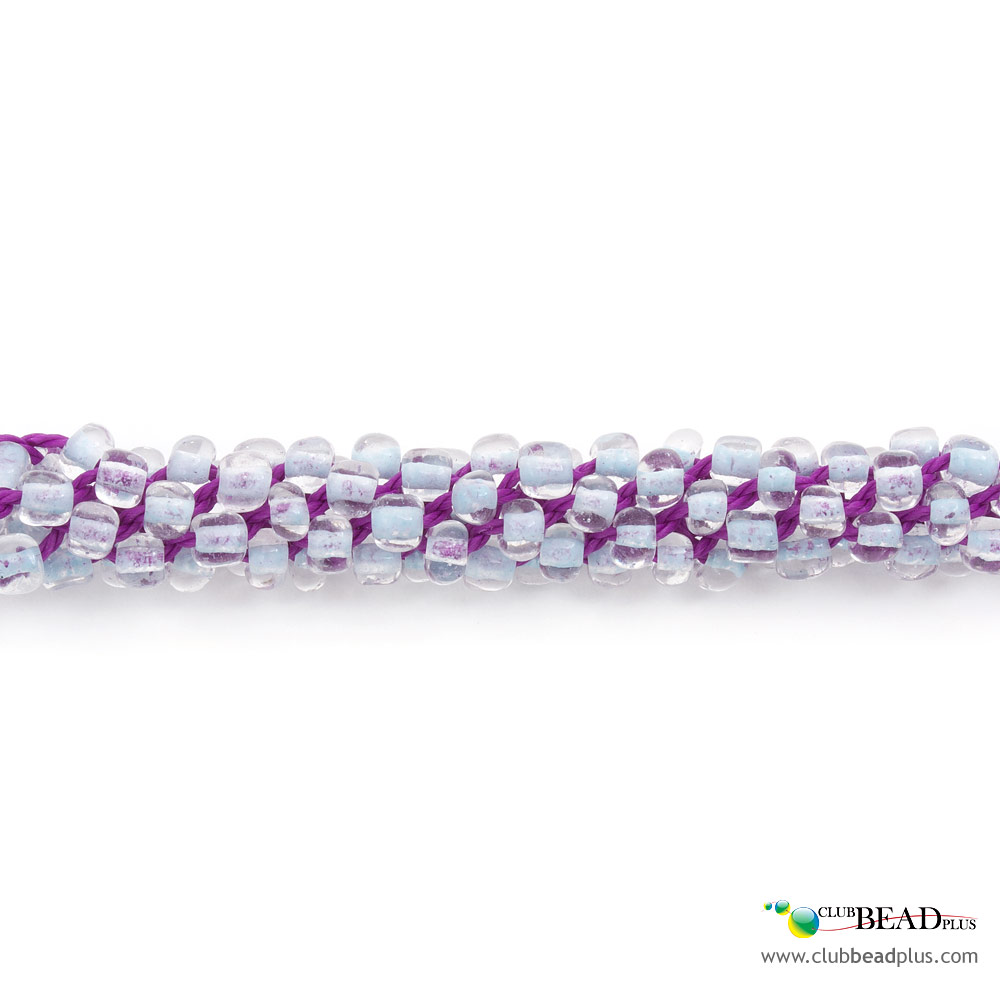
Tubular braiding with beads
For this braiding, you will need 4 ½ times the length of the desired braiding.
Step 7
Place all 8 strings on the disk, just as you had done for the bead free tubular braiding (step 3). Make one or two laps devoid of beads to be on a good start for the braiding (steps 4, 5 and 6).
Step 8
String about twenty beads on each piece of string that hang on the disk’s side. Make a knot at the end of the strings to keep the beads from falling. While braiding you will need to add beads on the strings, therefore make knots that can easily be undone.
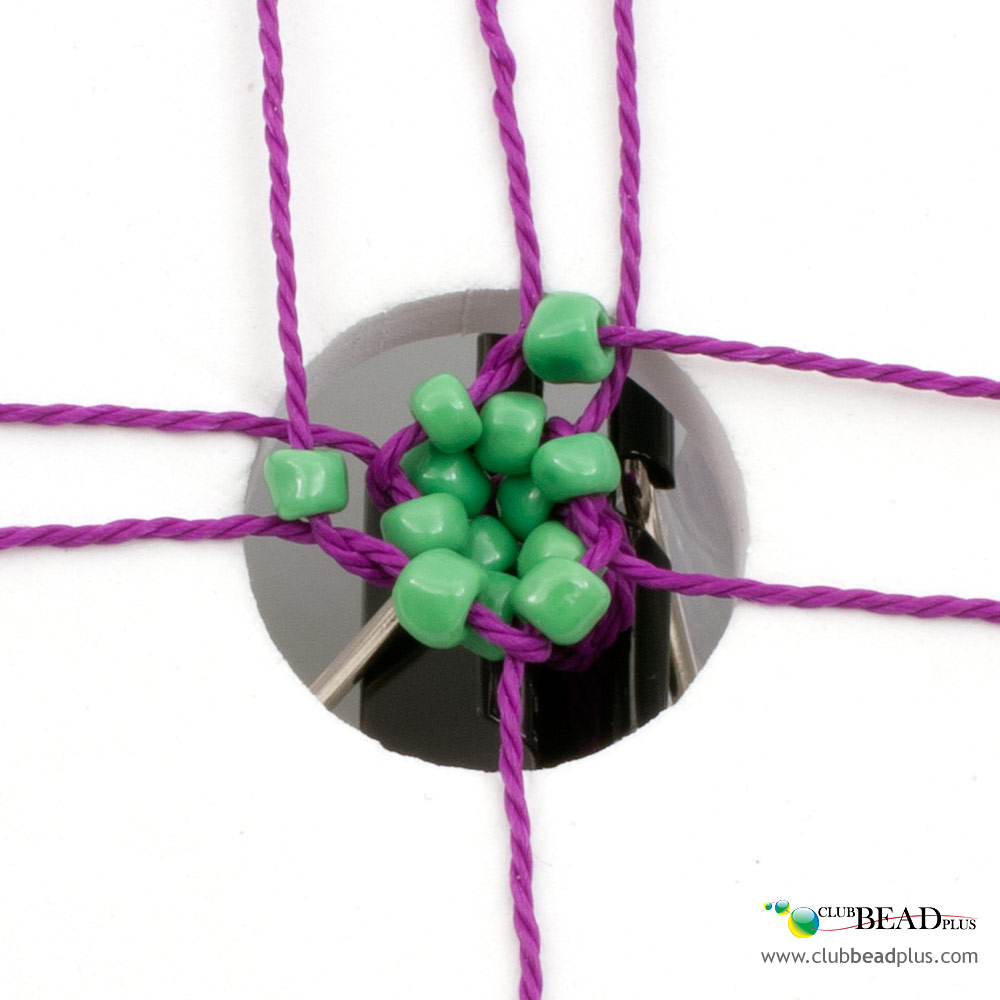
Step 9
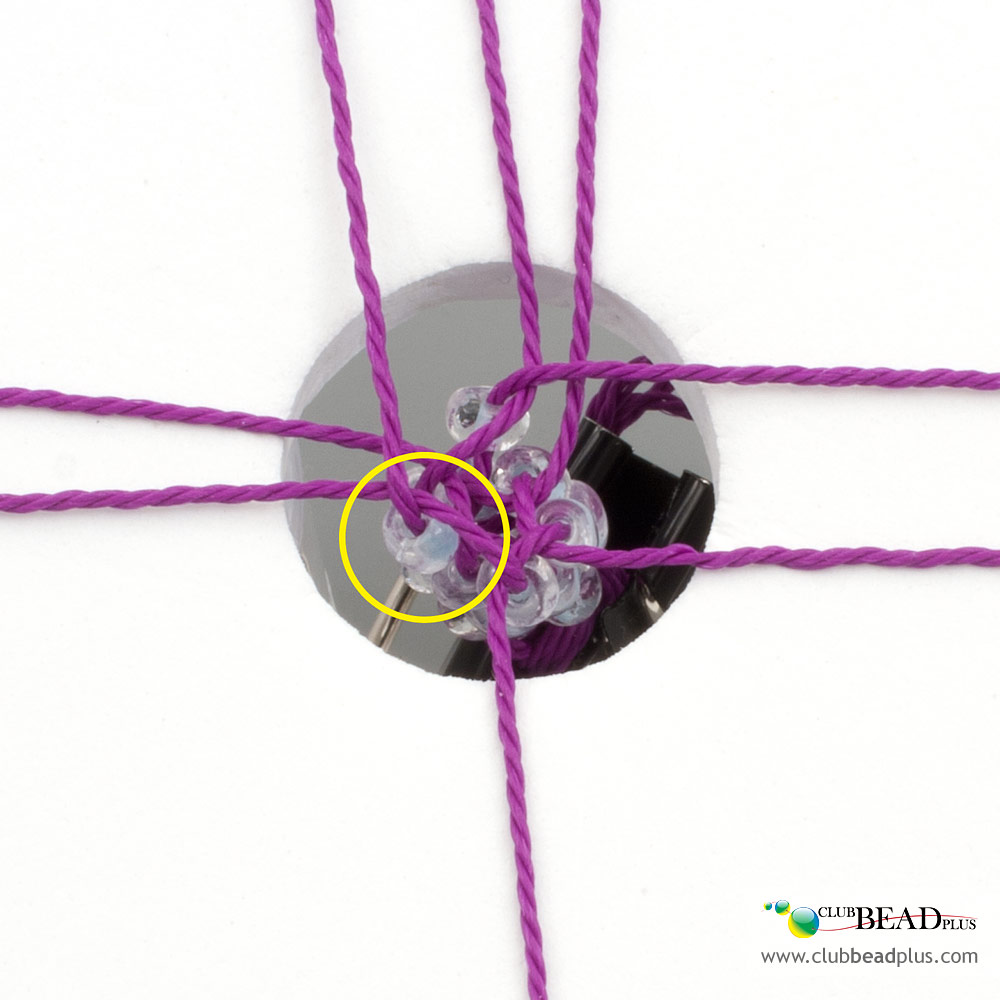
Proceed in the same manner as steps 4 to 6 of the tubular weaving and slide a bead every time you move a string.
To achieve this result, position the bead over the 1st string that is perpendicular to the moving string and between those 2 perpendicular strings, as illustrated.
To achieve this result, position the bead under the grid-pattern of the string and under the string that is perpendicular to the moving string, as illustrated.
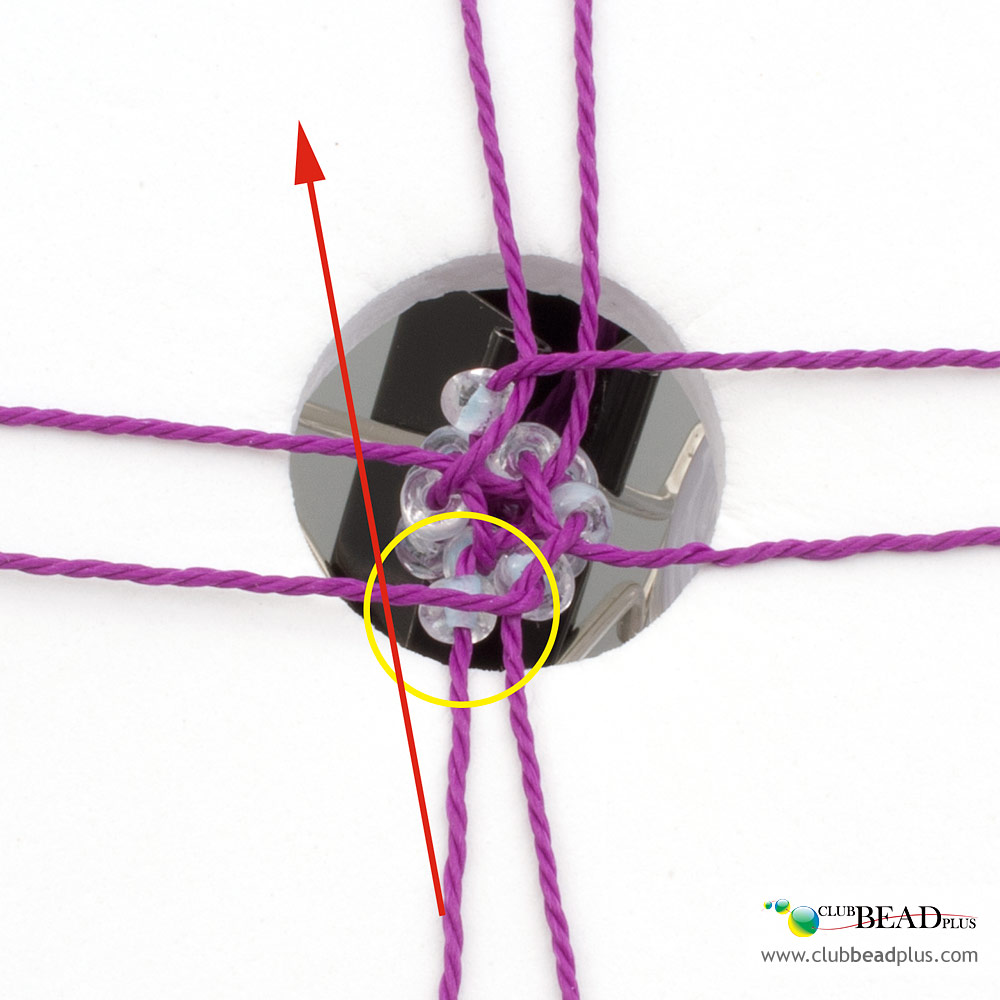
Add beads if needed. Repeat until you get the desired braiding length.
Flat braiding
Place the 8 strings on the disk like you did for the previous braiding (step 3) but this time you will need 5 times the desired braiding length. Make sure you start the braiding by placing the disk so as for #32 to be oriented upward.
Step 10
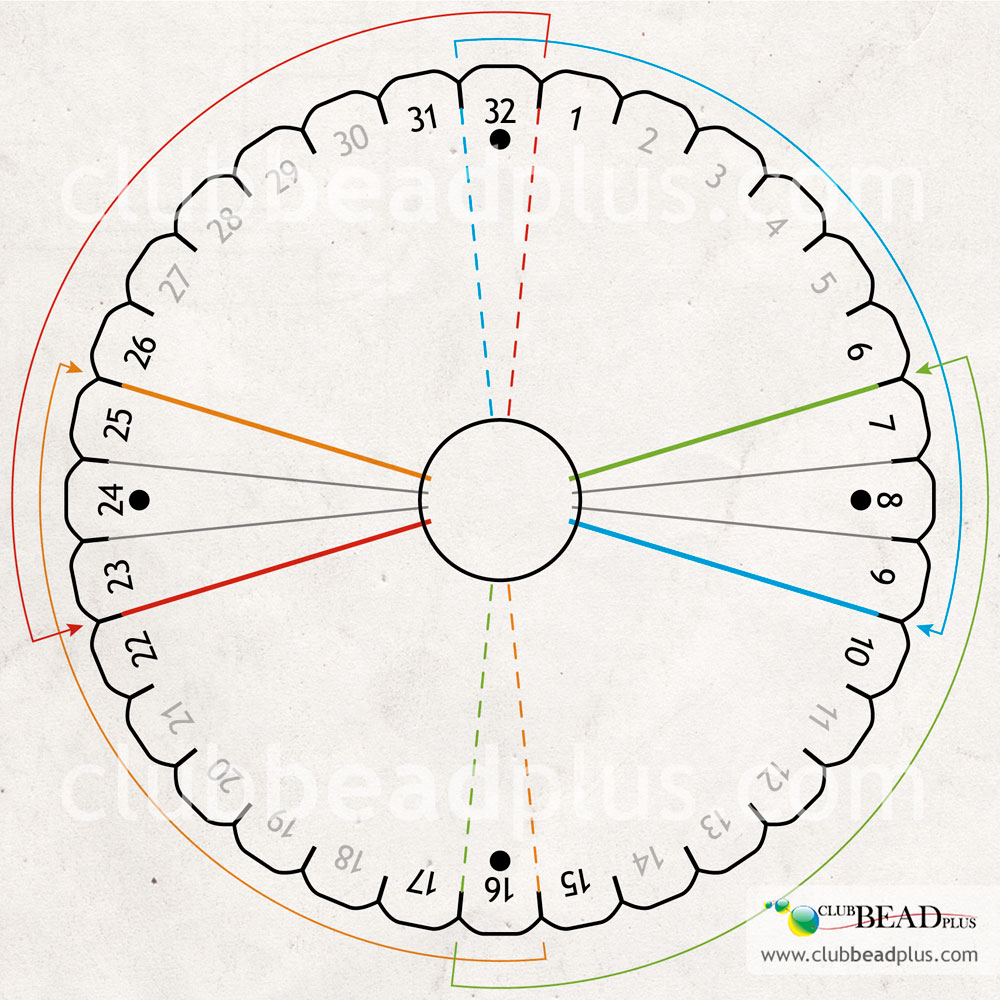
Remove the string between # 31 and 32 and put it between #9 and 10.
Remove the string between # 32 and 1 and put it between #22 and 23.
Remove the string between # 16 and 17 and put it between #6 and 7.
Remove the string between # 15 and 16 and put it between #25 and 26.
Remove the string between # 32 and 1 and put it between #22 and 23.
Remove the string between # 16 and 17 and put it between #6 and 7.
Remove the string between # 15 and 16 and put it between #25 and 26.
Step 11
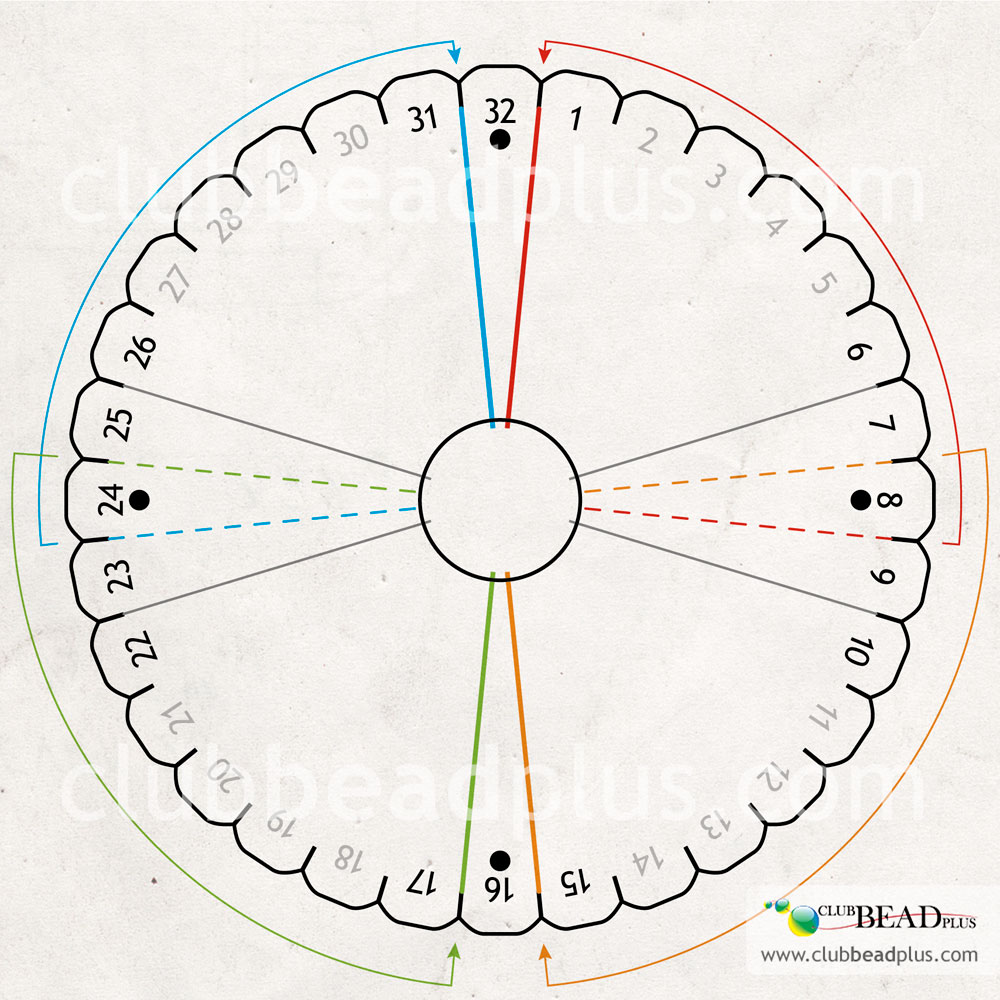
Remove the string between # 7 and 8 and put it between #15 and 16.
Remove the string between # 24 and 25 and put it between #16 and 17.
Remove the string between # 8 and 9 and put it between #32 and 1.
Remove the string between # 23 and 24 and put it between #31 and 32.
Remove the string between # 24 and 25 and put it between #16 and 17.
Remove the string between # 8 and 9 and put it between #32 and 1.
Remove the string between # 23 and 24 and put it between #31 and 32.
Step 12
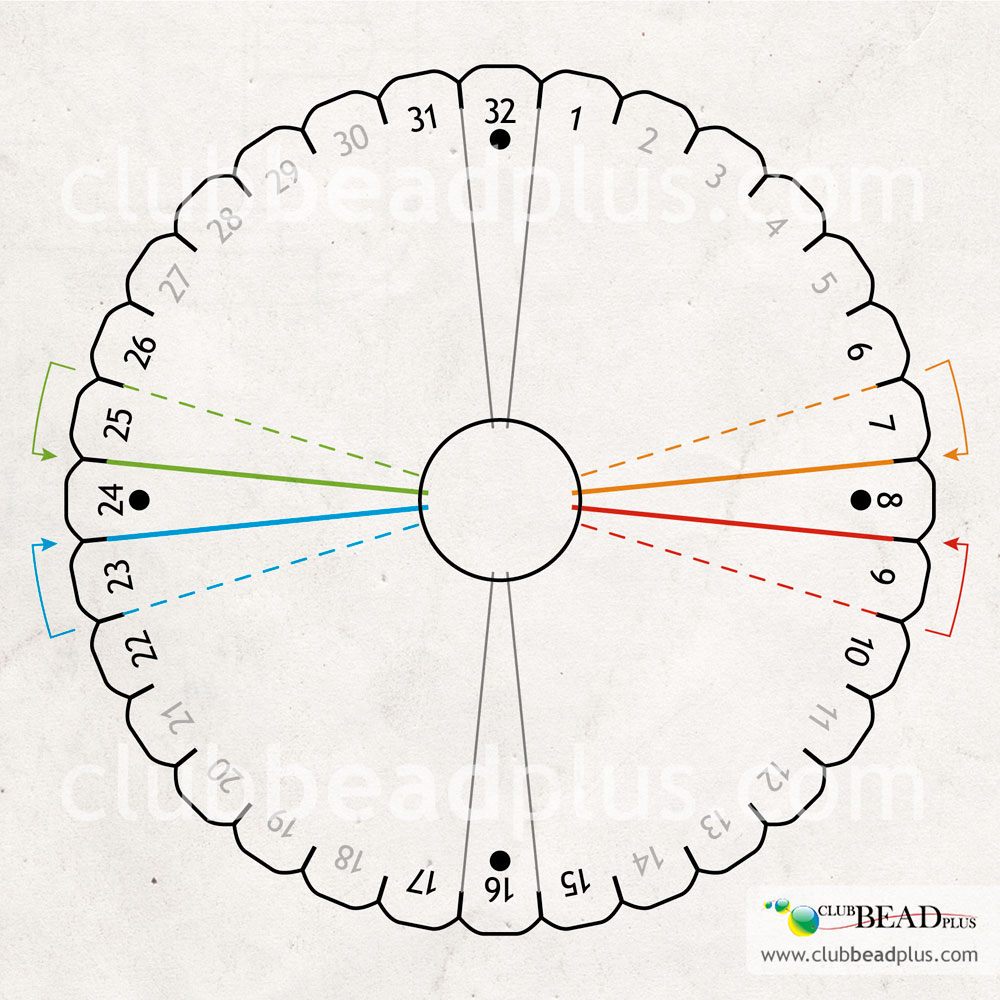
Remove the string between # 6 and 7 and put it between #7 and 8.
Remove the string between # 9 and 10 and put it between #8 and 9.
Remove the string between # 25 and 26 and put it between #24 and 25.
Remove the string between # 22 and 23 and put it between #23 and 24.
Remove the string between # 9 and 10 and put it between #8 and 9.
Remove the string between # 25 and 26 and put it between #24 and 25.
Remove the string between # 22 and 23 and put it between #23 and 24.
Step 13
Repeat steps 10 to 12 until you obtain the length of braiding desired.
Finishing touches
Step 14
Remove the strings from the disk’s slits one by one while holding the braiding under the disk with your other hand to prevent the braiding from becoming undone.
Step 15
Select the connector or appropriate technique depending on the type of string used and the size of the braid.
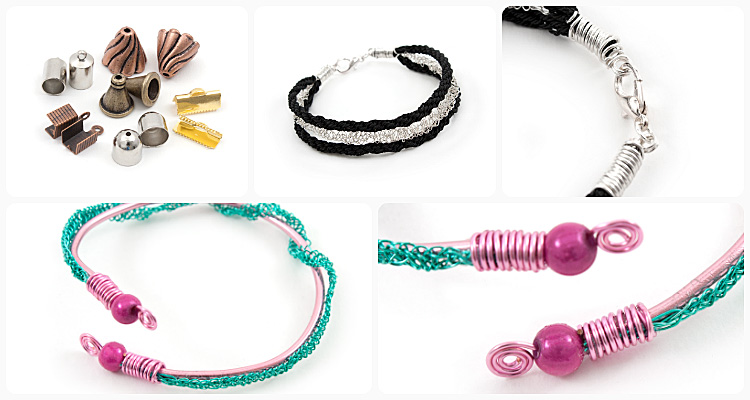
For the cord braiding finishing touches, please see the “cord” tech sheet.
For the metallic wire braiding finishing touches, please see the “loop” and “crafted clasps” tech sheet.
For the metallic wire braiding finishing touches, please see the “loop” and “crafted clasps” tech sheet.
Add a touch of fantasy by making your own clasp using a bead.

Patterns
By varying colors, you will get different patterns.
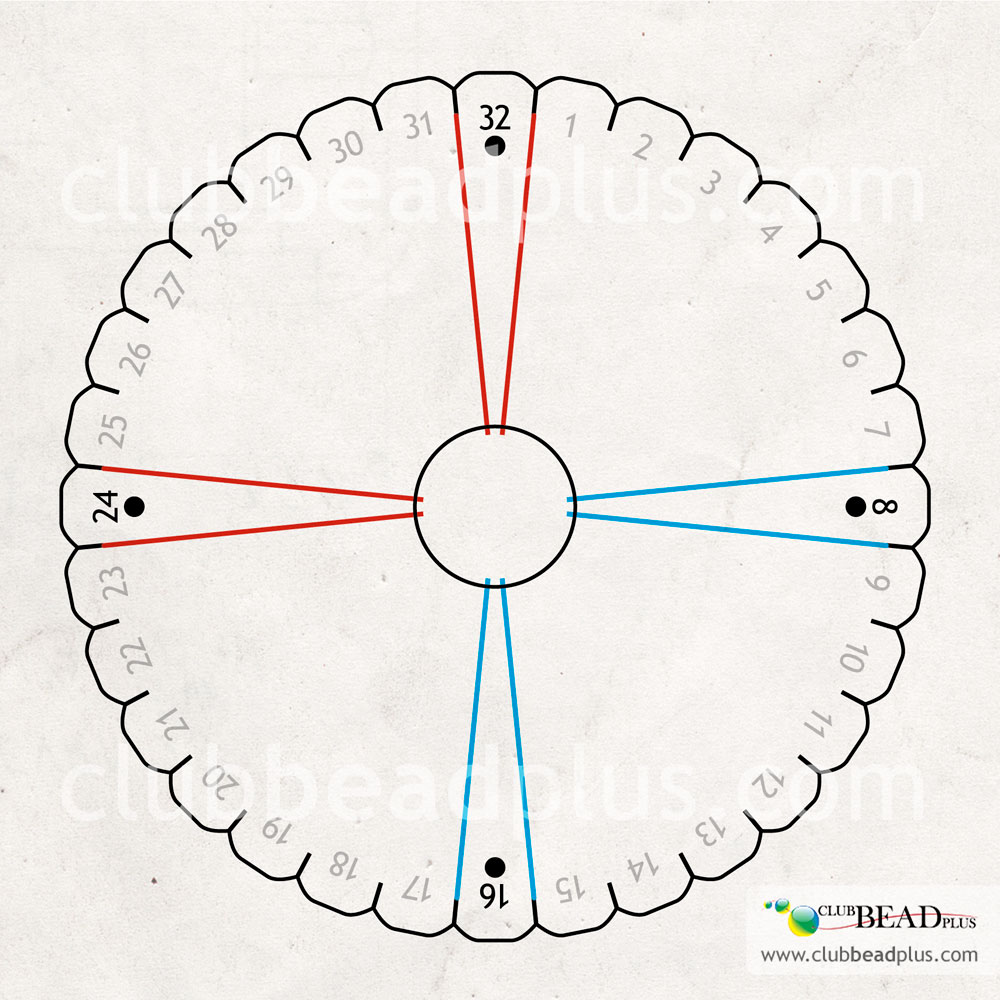
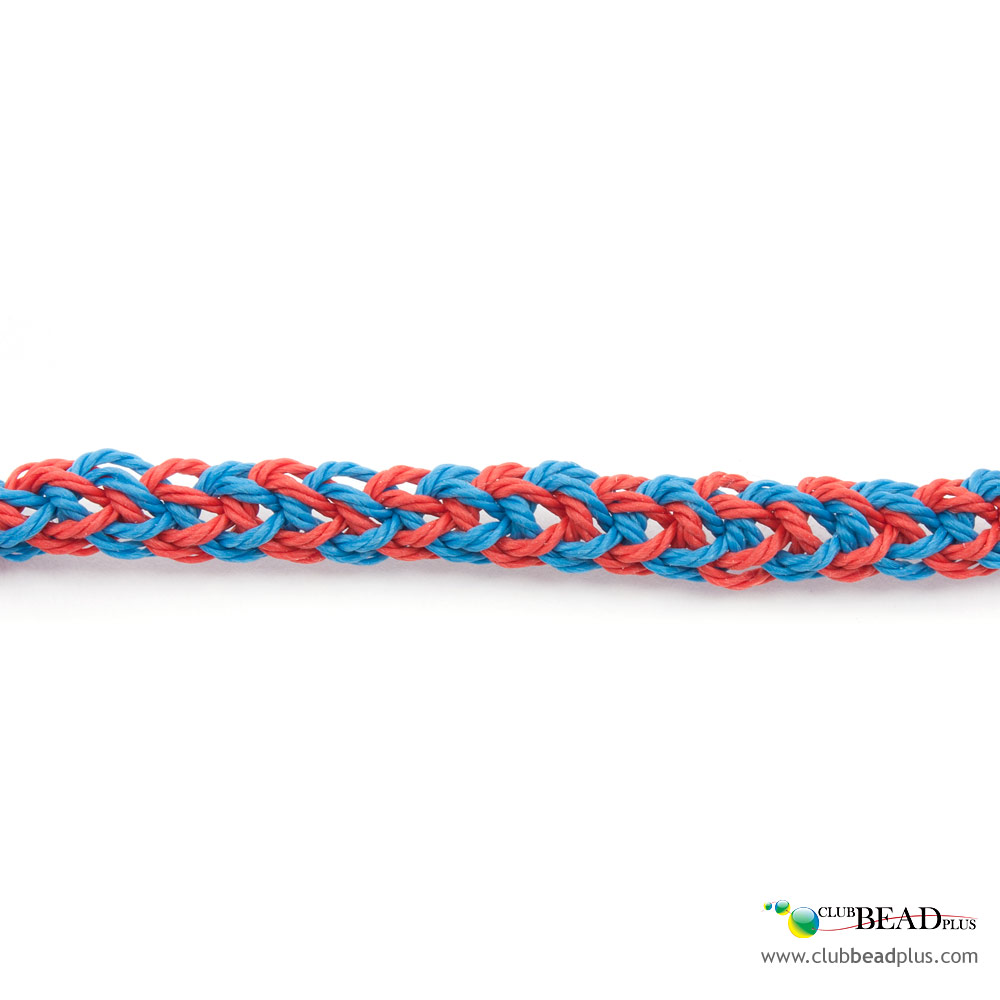
Tubular braiding with 2 colors
A- Stripes
To achieve this result (photo), place the strings as illustrated.
B- Bi-colored spiral
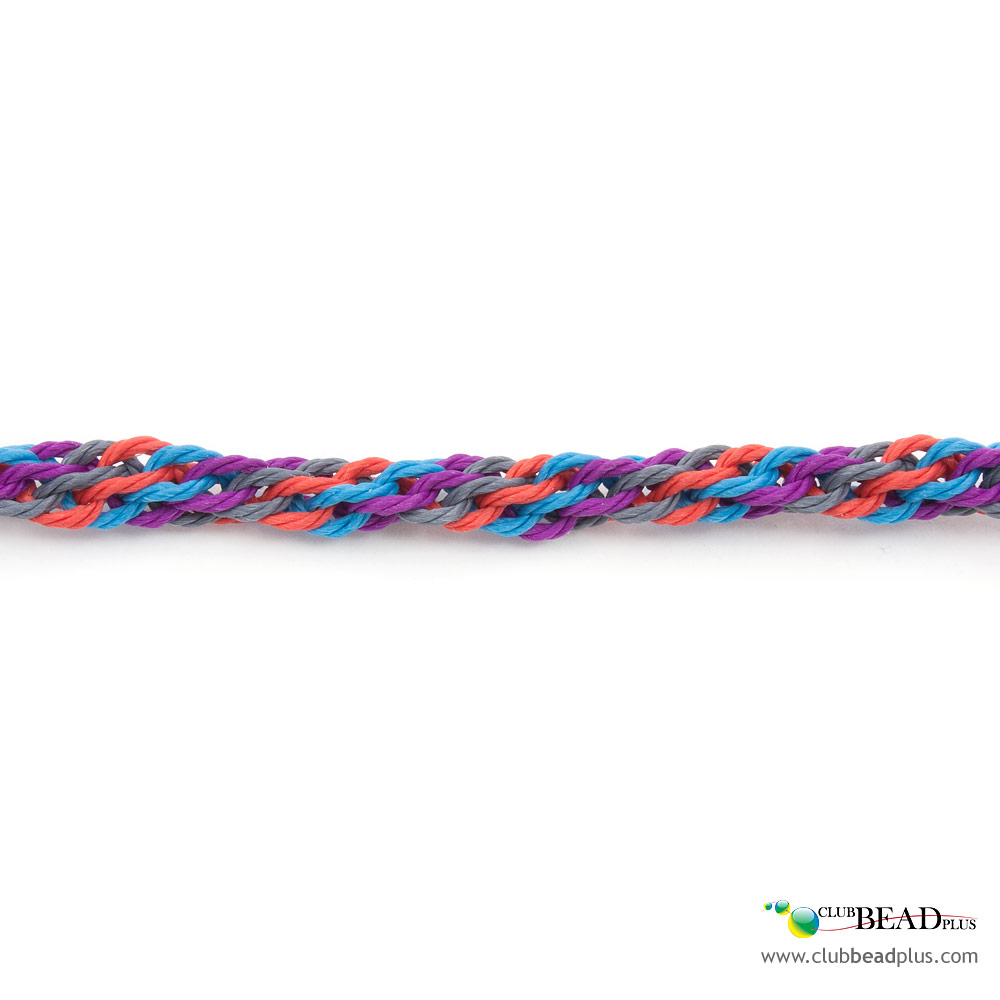
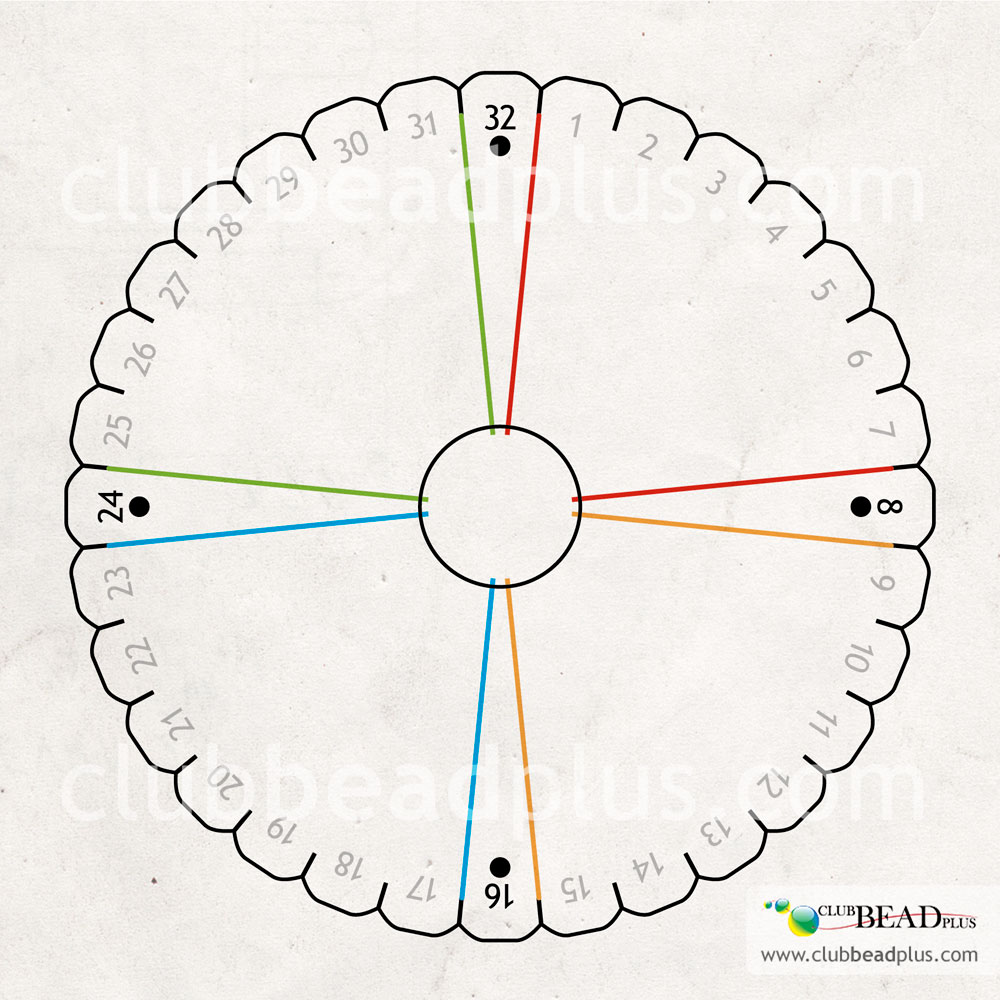
Tubular braiding with 4 colors
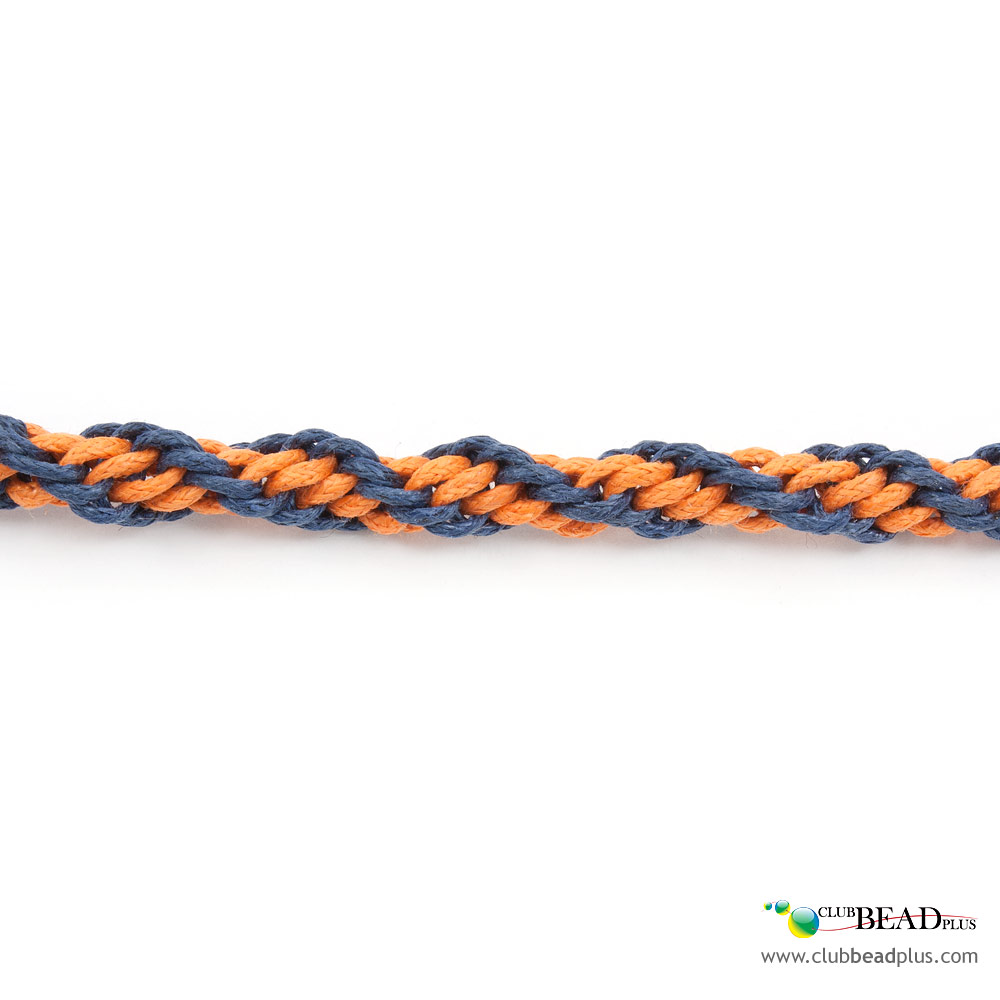
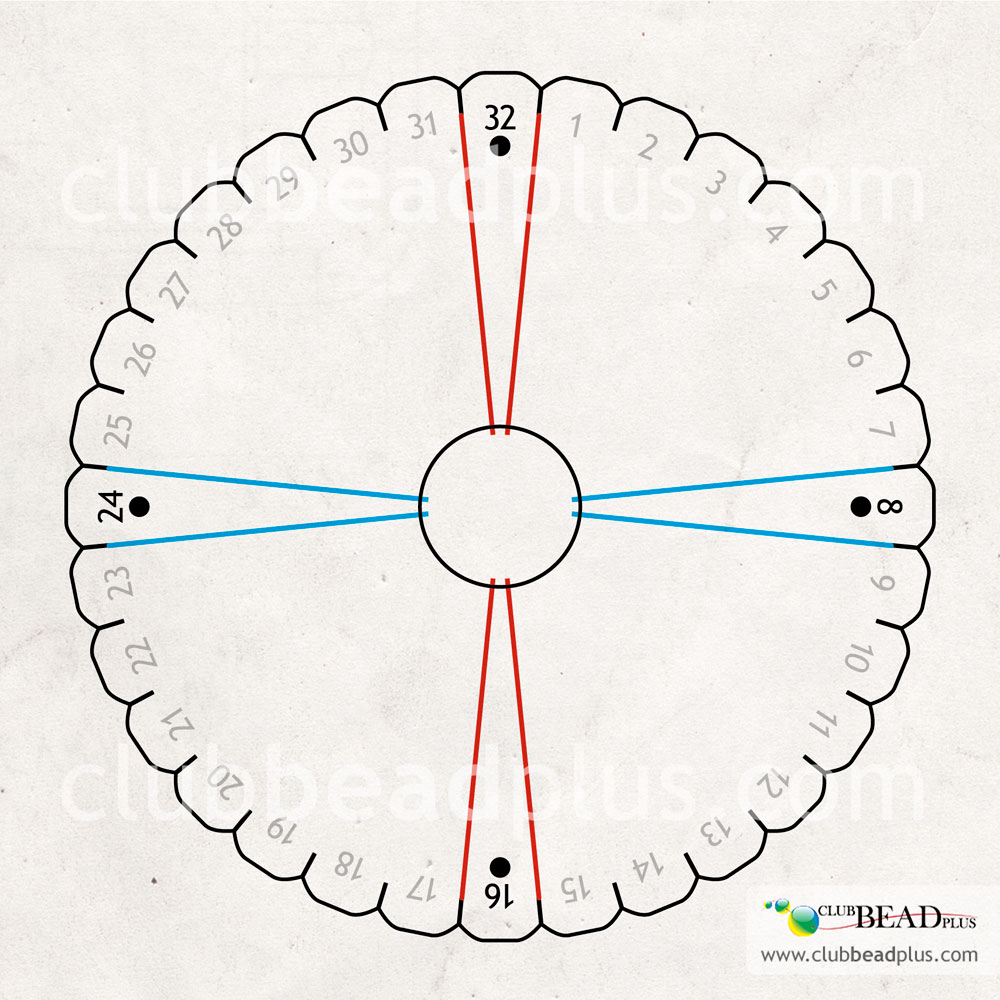
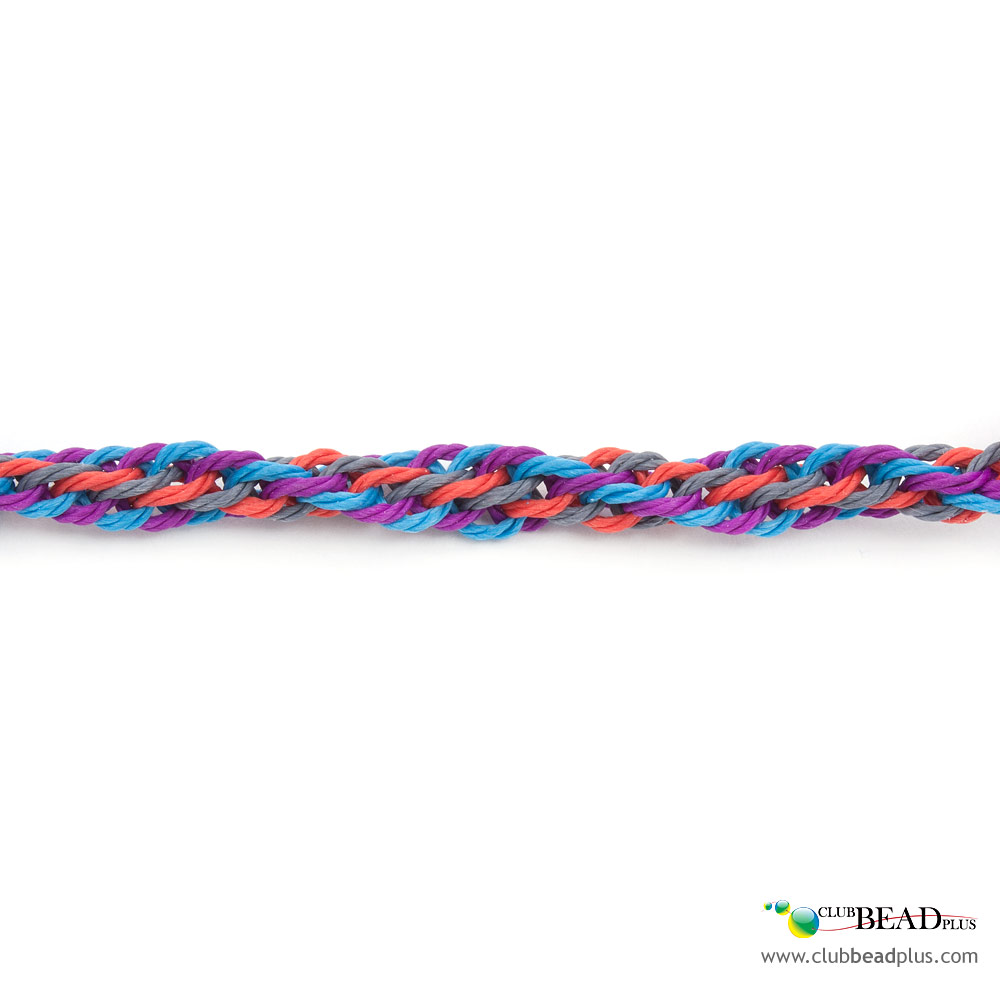
C- Simple alternated spiral
To achieve this result (photo), place the strings as illustrated.
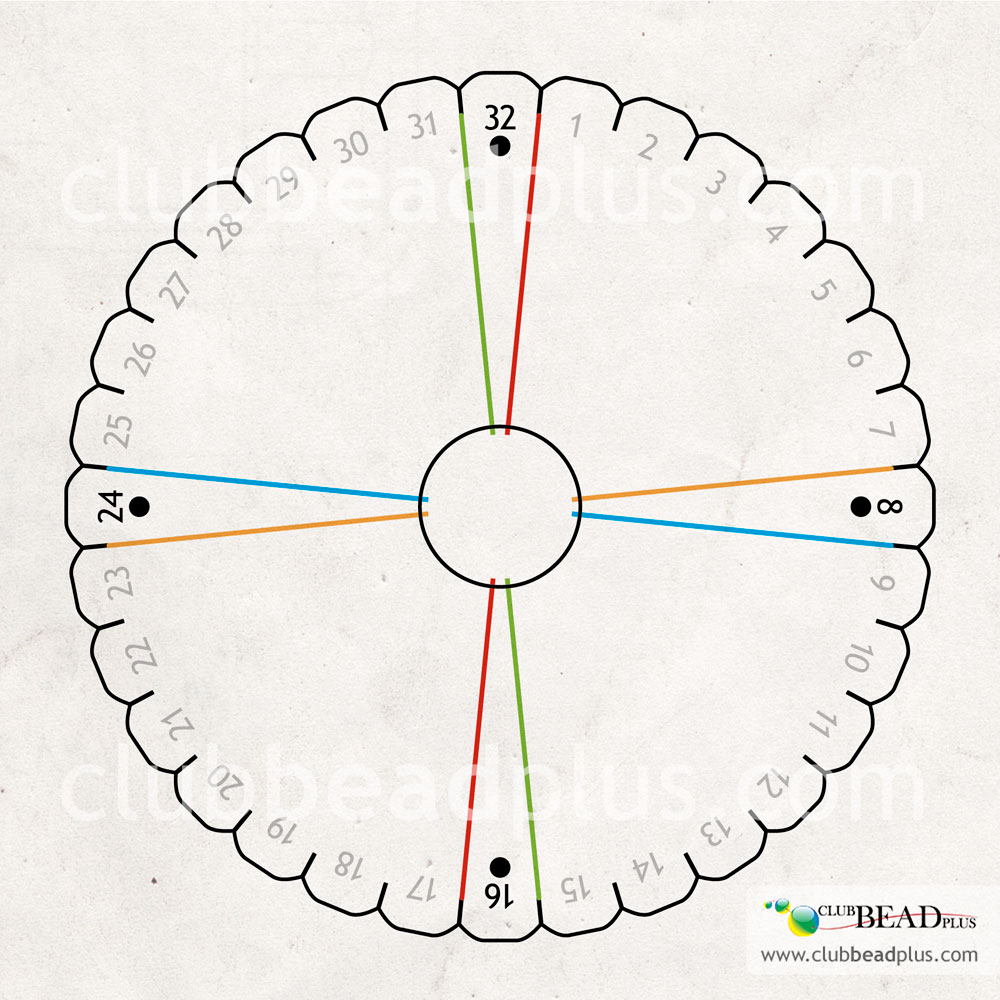
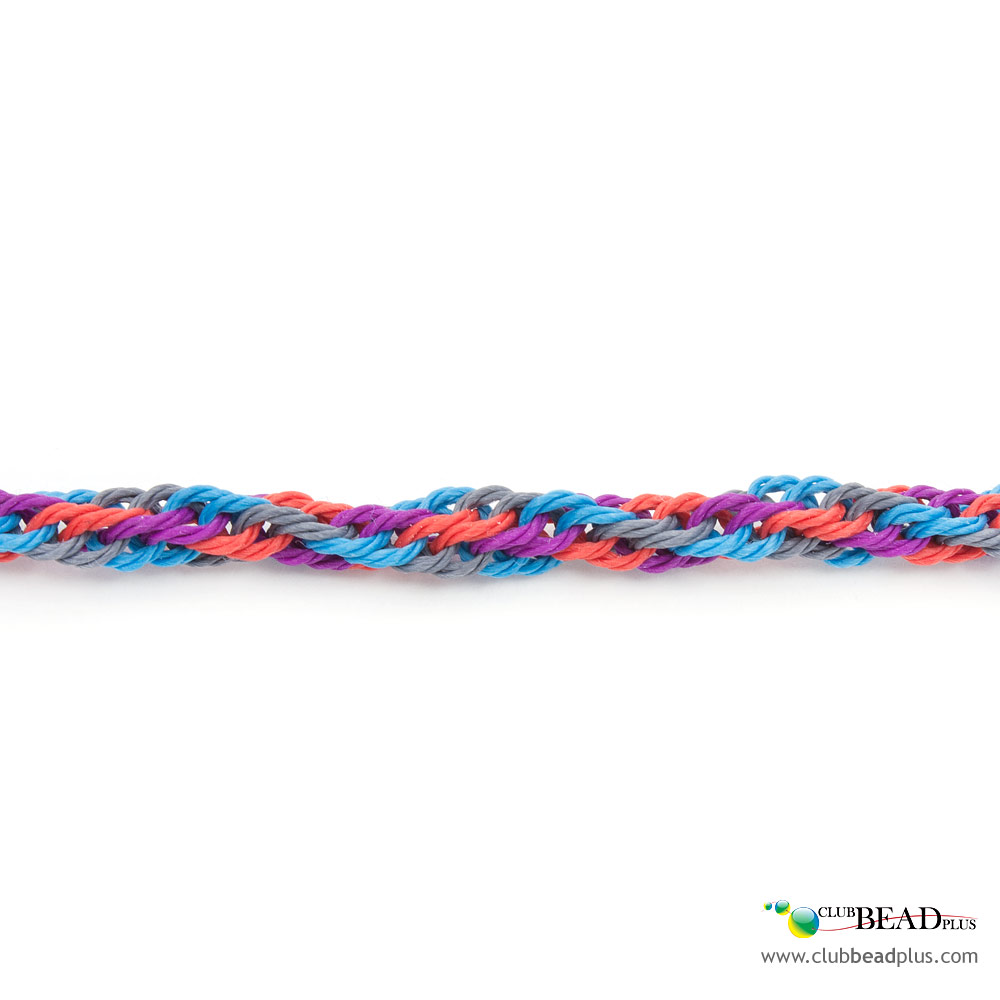
D- Double alternated spiral

E- Diagonal stripes
F- Diagonal multicolored stripes


Flat braiding
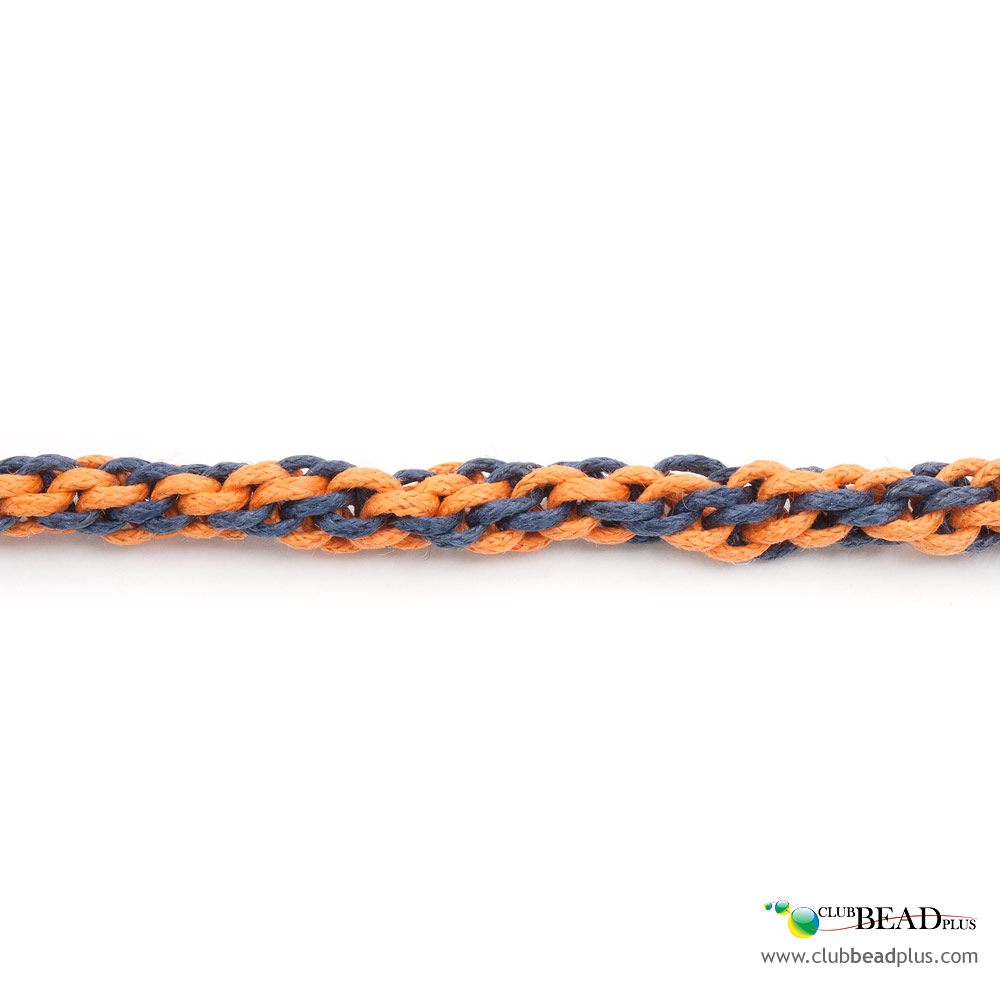
G- Serpentine
To achieve this result (photo), place the strings as illustrated.

H- Criss-cross

Increase the number of strings and colors to add variety or challenge your skills!